

 |
 |
|
|
Blinkring
Nerdy Jewelry - or - Jewelry for nørds
Sometimes I get impressed by the ideas that come up at the local
hackerspace. We have a member, Inger, who has been doing nerdy
jewelry workshops, where all kinds of stuff is made from old computers.
Making earrings from harddisk components, a snail from a aluminium cooling
block with fan-grids and wires, a christmas tree from harddisk PCBs and
SDRAM-DIMs. You name it and it gets made.Inger is no engineer or technician. She held a screwdriver in her hands for the first time at the hackerspace. She is a quick learner and has a unique perspective on things. She was trying to put together a LED on a harddisk-spindle mount, to be used as an earring. As a non-tech, I explained her how to make connections and the like. All the work, however, was done by her. Inger's funny piece inspired me to design a more advanced piece of nerdy jewelry. I had seen Mats' fabulous job of "hiding" a battery inside a PCB on Dangerous Prototypes. That can be used for an earring as well. And surely, you can also just hang it around your neck as a nerdy hanger. [update: You can buy them now at Tindie] A simple manual is available describing handling and operation. 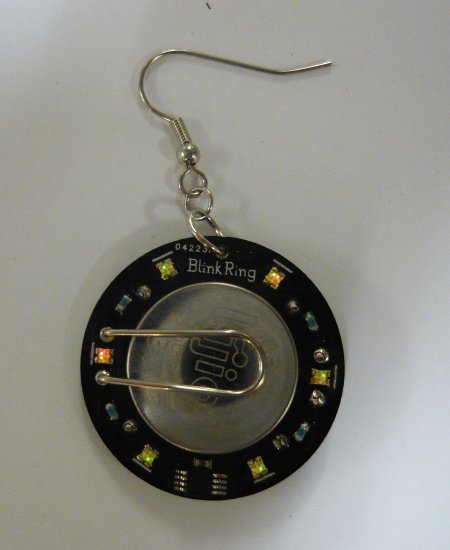 The concept is simple: make a round PCB with a large hole milled out in the middle and put some LEDs and a micro-controller on it. Program a blinking party and done.
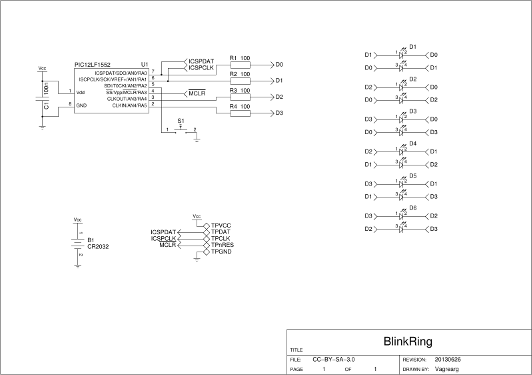 Or schematic as PDF. The concept of an earring is simple you need some "statement of display" and a hanger to put through your ear. The hanger part is easy, you buy them in a store in bulk. The "statement" part is a bit harder. There you have to consider not only aesthetics, but also usability and functionality. The battery is using Mats' paper-clip trick, that is (relatively) easy. I say relatively because there is a spring-function missing is his original design. The problem is when you insert the battery, you want the paper-clip to press down and look nicely flat. That turns out to be a challenge and a second attempt made up for the shortcomings. 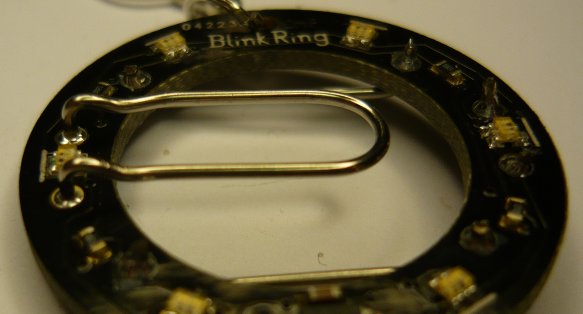 You can see the added bends at the base of the battery-holder-clip. Those bends ensure a spring action and make the clip adjustable in height such that the clip is plain on the battery when inserted. I also wanted a switch on the device. A switch enables user-control, where both on/off and mode selection can be handled. It was decided to try to make a switch from a paper-clip. That sounds easy, but in practice, it is very hard. A switch needs to have a low activation force and must include a spring function. My first try was a simple bent piece of wire, but it turned out to be very hard to activate. The second try was more successful. The wire is wound as a spring and folded for better finder-feeling. That works nicely, but is a lot of work to make. 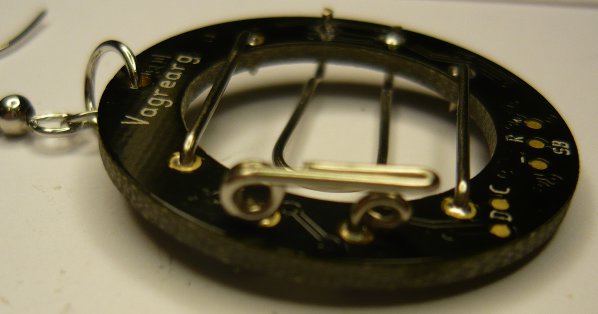 Even though the final result looks nice (in my opinion at least), the next version of the PCB will include a "real" switch (2.4x3.4mm) so that I may refrain from this hard and difficult switch-bending work. Programming this little device has its own challenges. For one, the PIC12LF1552 used in this project is not supported by the PICKit2 programmer and a data-file hack was needed to get programming support working. Luckily, others have had this problem too and you can use the PICkit 2 Device Data File Editor. Unfortunately, it needs windows (so I needed to fire up a virtual machine, cross fingers, and hope for the best). It did work and programming could commence. The second challenge in programming small designs is the complete and utter lack of "standard" ICSP programming headers. You do not want to clutter your design with bulky headers at all. You need pogo-pins. The PCB has five small exposed pads on the backside (see above). These pads are the ICSP programming pins. A small helper-board was made with a set of spring-loaded pins which can be pressed onto the PCB. Alignment can be a bit tricky, but with a little practice it works fine. 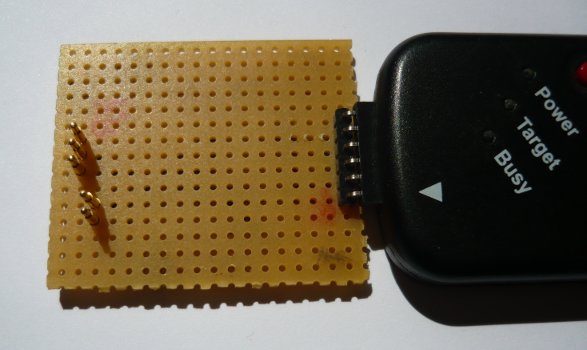 When designing a PCB that needs pogo-pins, you need to be very careful to design it in a way so that you can use a standard vero-board (or something similar). In this case, it was carefully planned to have the pads spaced at 100mil intervals, just like a vero-board. In mass-production, you will need to do a lot more thinking to enable testing and so. Functionality is given to the device with a lot of software. The really hard part of modern electronics. There are 12 LEDs in total. Six red and six green. The red/green LEDs are in one house and spaced at 60 degree angle. The LEDs are organised to be chariplexed, using 4 GPIO for 12 LEDs. Initial testing readily showed that the choice of series resistor was wrong (originally 470Ω). The intensity would be too low and the resistors were reduced to 100Ω. The second problem immediately apparent was the huge intensity difference between the red and green LEDs. I had chosen the LEDs based on similar specs for both red and green, but there is still a lot of difference in practice. A software solution needs handle that case. The firmware for the device comprises a setup where all 12 LEDs are charliplexed at about 710Hz. This enables each LED to have 16 levels of intensity from off (0) to max (15) at an effective rate of ~59.2Hz. The green LEDs are activated about twice as long as the red LEDs to compensate for the difference in intensity. The processor runs at 1MHz (Fosc/4 = 250kHz). The firmware includes tables with commands for different modes of operation. Each command says something like "set LED red/green [0-5] at level [0-15]". Pressing the button will advance to the next mode and show a new pattern. Holding the button for a second will turn the device off (same as mode 0). The processor will enter sleep when off and react to a press of the button to wake up. It is estimated that the battery will live for something between 100 and 200 hours of active operation, depending the pattern displayed. The battery should live for much more than a year when the device is kept in sleep.
Posted: 2013-07-22 |
| Overengineering @ request | Prutsen & Pielen since 1982 |